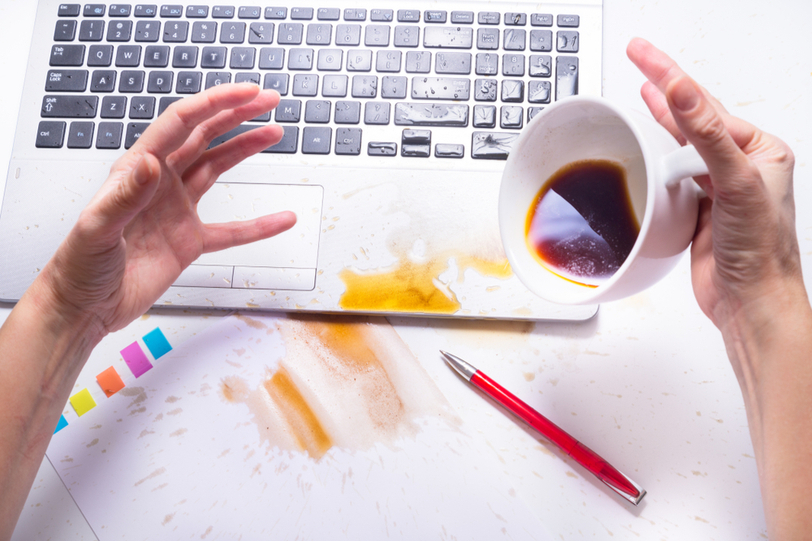
Getting water or any other liquids spilled over your laptop is quite common since we use it very often everywhere from homes to offices. Situations such as coffee getting spilled over your laptop in the office and juice in a while doing homework, etc. are uncertain.
Water or any other liquids cause damage to your device only when they sink in. The variations of damage depend on the type and intensity of the liquid such as water is least dangerous while alcohol and other liquids may cause long-lasting damage to your device.
If water gets spilled over your laptop, first you need to make sure that you stay contained and don’t panic. The possibility is that you can fix the laptop with simple damage prevention steps.
There may be some effects of water on your laptop that might not be fixed at home. You may need some experts to help to figure it out, then get it to a repair shop.
Some steps to repair your water damaged laptop:
- The first step to rescue such a situation is to shut down the laptop and remove all power sources attached to your device. Don’t waste your time while doing the official process of shutting down the laptop, just press the power button and shut it down.
- Remove the battery and any other external or additional hardware such as a mouse, USB, charger, memory card or CD if possible. Although, there are certain laptops doesn’t allow the user to remove the battery.
- It is suggested to remove the battery in order to avoid any possible short circuit in your laptop.
- Wipe out all the liquid that is on the surface to make sure that no excess amount of liquid goes inside the laptop.
- Place a towel or any lint-free cloth on the flat surface and then open the laptop wide depending on its flexibility and set its face down at the towel. It will look like a tiny tent. This will help the water to move out rather than sinking inside.
- Make sure that the area where you are keeping your device for evaporating the water should be warm and airy; you can also use humidifiers. Don’t use a warm hair dryer to speed up the process because that can make the internal parts of the laptop extremely hot, which may lead to errors in the system.
- Keep the laptop in the same upside down position for about a minimum of 2 to 3 hours without disturbing it. Wipe away the liquid found on the surface or keyboard while keeping the laptop in the position before you put it in the normal direction.
If your laptop allows you to detach its internals:
- Before touching your device’s internals, make sure that your feet are in contact with the ground, which will remove the static electricity from your body and clothes that may kill circuitry.
- There will be several screws you may need to open before reaching inside of your laptop.
- Before unscrewing the laptop, find the guide manual of your device and read the instructions which will help you in removing the hardware and will guide you through the process as you may not be a hardware expert.
- Remove the hardware that you can, don’t rush the process and damage the sensitive parts.
- If you don’t find detaching the internal components easy or if you get confused even after following the manual, then the best option is to go to a professional to repair your device rather then doing it yourself.
- If you are able to detach the internals conveniently, then pat them dry using a lint-free cloth, or you can also use earbuds to clean the micro-components of your reach.
- Cleaning with low compressed air can also be used but make sure that the pressure of compressed air does not cause harm to your device’s hardware.
- Leave your laptop to dry internally. Keep the device in a warm and dry area.
- Never keep your device in sunlight to fasten the process as it won’t help, but instead the rays of sunlight may cause serious damage to your device.
- After the complete drying of your laptop’s hardware, reassemble all the parts, and clean any sticky or greasy content running out of your laptop.
- This whole process is, and it will take 24 hours minimum.
- Don’t rush to turn on the device in a hurry, take your time, and let the laptop get properly dried.
- After you get satisfied that your device is free from moisture, then turn on the shore and check overall functioning from hardware to software.
If your laptop doesn’t allow you to detach its internal components:
- Even if your laptop can’t be detached, you can pat dry the external surface and turn your laptop upside down.
- Soak up the moisture as much as possible.
- Clean up the keyboard as far as you can.
- Check whether there is any warranty that is still applicable on your laptop, as most of the un-detachable laptops have a warranty for its internal components.
- Don’t try to open it forcefully, became if you detach such devices, the author may not accept or take responsibility for the possible damage.
Even after removing moisture from the laptop, the liquid may have harmed several circuitry such as the keyboard won’t work properly or the touchpad would not respond. In such situations, you must opt for expert repair to get reliable results.
In some cases, changing the hardware might be suggested, but it completely depends on the damage caused by the spill.
To prevent such situations in the future, you can apply transparent silicon or plastic keyboard cover on your laptop to keep your device protected from external threats such as water or dust. However, you must not cover the ventilation holes as they may heat up the internal hardware that will cause serious errors.
Contact us today to learn about Bleuwire™ services and solutions in how we can help your business.