All the documents, pictures, music and any other files that we wish to store on a computer, laptop or notebook are stored in the long-term memory in the storage drive. This storage drive can be a hard drive or a Solid State Drive, also most commonly abbreviated as SSD. Most laptops or notebook computers now come with an upgradable storage device, i.e., the users themselves can change/replace the hard drive with a new one or upgrade it to an SSD.
It so happens that in most cases, the users are a little uncomfortable to handle the components themselves and replace or upgrade parts of their laptops/notebooks on their own. But it is to be kept in mind that this is in fact not a very tedious or strenuous task and can be done easily, provided you proceed with caution as to not cause damage or scratches to any part. Other than all the usual necessary precautions we would normally take before initiating such a task, there is nothing particularly challenging or difficult per se, in replacing a hard drive by ourselves.
Getting prepared:
- Be sure to backup all the necessary files you will be needing in the future from the current storage location in your device. Once you replace your hard drive, you will also be in need of an operating system and other programs. Therefore, make sure to have the installation programs of these applications ready before you remove the current hard drive for the new one.
- Switch off the device and remove the battery. Also, unplug it from any connected sources. The battery can be removed by unscrewing the panel that holds it in place.
- Next, you may need to get rid of any static electricity that might have been built up. For this, either press the power button a few times after the battery has been removed or place the laptop/notebook any metal surface where the excess charge can be transferred.
Steps involved in removing current hard drive:
- First and foremost, it is important to locate the panel where the storage device or hard disk is being held in your laptop/notebook. This panel is usually held in place securely by screws and can be unscrewed with a screwdriver to pop it loose. The concerned screws can be screwed back in with ease once the task has been completed.
- The panel is generally located at the bottom or backside of the laptop/notebook. Flip your device and find this panel. There are two possibilities for the panel’s location. It could either be a space-separated from the rest of the area, making it easier to identify the spot, or it could be over the entire space that encloses other serviceable/upgradeable components as well.
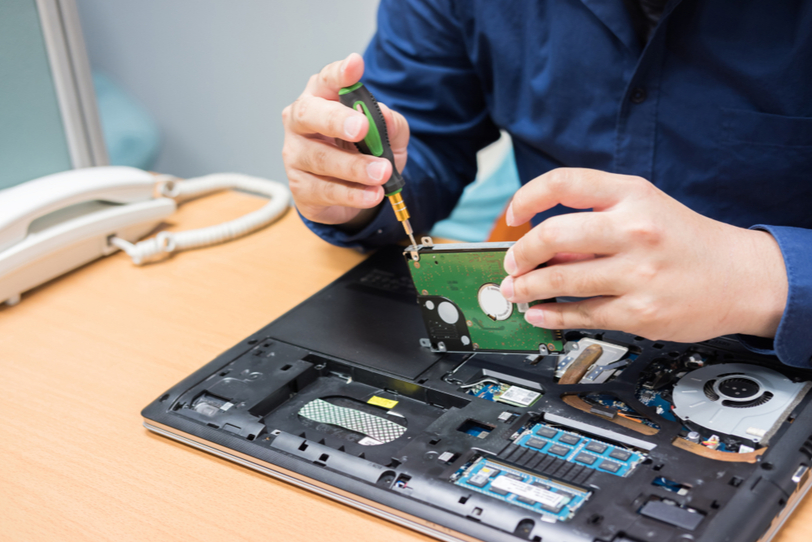
- Once the location of the panel is identified and the screws holding it in place is brought loose, it’s time to carefully remove the hard drive from its position. Before the hard disk can be detached, take a moment to closely examine how the hard drive is being held in place, i.e., observe the components which are holding it in place. These components could be different for different devices. It is very important to identify this step since the hard drive is detachable in a specific direction only. If removed in the wrong direction or very abruptly, you might end up damaging the hard drive or the storage component or both.
- Carefully hold and pull out or detach the hard drive after you’ve figured out for sure the direction in which this can be done, as stated in the previous step. The detachment action will depend on the type of laptop/notebook. In some cases, it requires you to slide out the hard drive after removal of screws that may hold it in place. In other cases, you might have to remove the screws and lift it out. While performing either of these actions, care must be taken to ensure no damage is done to the connectors. If you are not careful enough and damage any of the connectors, placing the new hard drive might become a problem.
Installing the new hard drive:
- After the old hard drive has been successfully removed, a new one can be fit in its place. The new hard drive must be either slid into or fitted from above, depending on the type of device, as stated earlier.
- Follow the same actions that were used to remove the hard drive but in the opposite direction, to replace it with a new one. If you slid out the previous hard drive to remove it, slide in the new one in exactly the opposite direction to place it intact with the connectors. Once you’ve ensured that it is in place correctly, use the screwdriver to put the screws back into their original positions.
- If you’ve removed the battery from its position, place it back in the same way by securing with screws. In case there wasn’t a necessity to remove batteries and you only removed the hard drive from its separate panel, skip this step.
- Now, place the panel back and begin screwing in all the screws that were removed one by one. It is important to ensure that all the connectors have been securely held and engaged in the same way as they were when you took out the previous hard drive. Double-check this before proceeding to fix the screws back using a screwdriver.
As is evident from the steps outlined above, replacing a hard drive in a laptop/notebook is a fairly easy task that can be done on your own. You only need to make sure that you are careful to not cause any scratches to the surfaces while handling the device. Take precautionary steps to observe the mechanism/direction of fixing in order to avoid scratches. Also, keep your backup system and installation and setup software ready before removing the hard drive. These are the simple steps involved in replacing a hard drive for laptops/notebooks.
Contact us today to learn about Bleuwire™ services and solutions in how we can help your business.